Here's what I used: fabric, piping trim, thread, a button, a hair tie, and another bamboo placemat.
Last time I made a case I made a casing for the bamboo placemat, this time I decided to glue the bamboo onto a piece of linen instead. Interestingly this may be why this brush holder is not as flexible. This one doesn't roll up as easily as the other one, but it still works! I left a little bit of linen on the sides so I could sew this part of the fabric, thereby keeping the bamboo placemat in place.
Here's the different pieces I used:
 |
| .5'' Seam Allowance. |
I winged it on the length of the pocket flap. Since I didn't know how much fabric I'd need for the give, I guess-imated on the side of excess and cut off the what I didn't use at the end.
And some instructions that might demystify the process or just confuse you more.....
Just a little note about making your own brush case: don't make pockets all the way to both edges. Keep about a 1''-2'' flap on the side next to the tie/hairtie, to protect the brushes. Otherwise at least one brush will be exposed. I tried to give a pretty thorough explanation. But I probably failed. Don't worry I winged my way through this one and the other one and they both turned out pretty nifty.
Total cost around $10, a day's work and a brush case that nobody else has :)
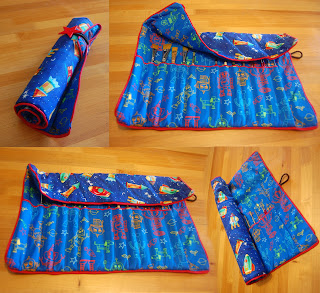
And here it is all finished and stuff. With awesome robots and spaceships to protect my brushes.


No comments:
Post a Comment